
Gingerbread Cream Cheese Thumbprint Cookies
Gingerbread Cream Cheese Thumbprint Cookies
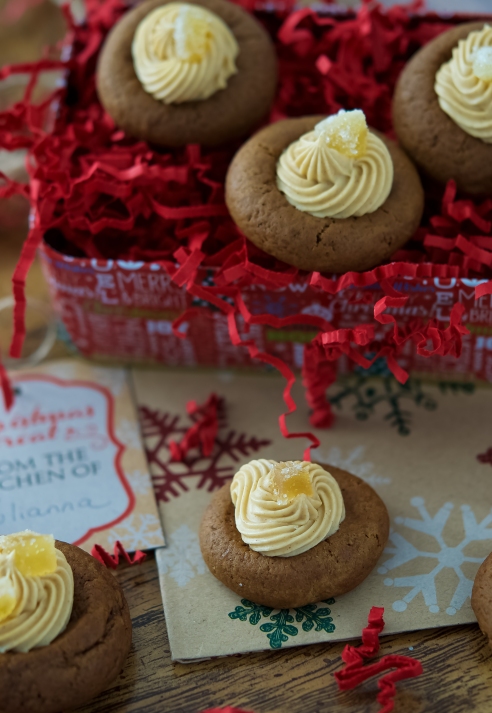
It’s Christmas baking season, and my stack of holiday baking magazines is growing! Honestly baking magazines have become my guilty pleasure, and a bit of an obsession. Good thing, because I had lots to choose from when making this recipe as my contribution to this year’s cookie exchange. I found this recipe in Canadian Living Holiday Baking magazine from 2017, and I was really excited about the outcome – so much so, that I decided to do a post for them! The cookies have a delicious chewiness to them, with just enough spice. The icing is luxuriously creamy with a peppery accent via the crystallized ginger. After my hubby and I did the “quality assurance test” we both agreed that I need to make these gingerbread cookies again next Christmas!

I will be sharing my cookies with Angie and the gang over at Fiesta Friday.
This week we are lucky to have Antonia @ Zoale.com and Kat @ Kat’s 9 Lives as our co-hosts!

Gingerbread Cream Cheese Thumbprint Cookies
Ingredients:
½ cup unsalted butter, softened
½ cup granulated sugar
1 egg
1/3 cup fancy molasses
¼ cup cooking molasses
3 cups all-purpose flour
1 teaspoon ground ginger
½ teaspoon cinnamon
½ teaspoon ground cloves
½ teaspoon baking soda
¼ teaspoon sea salt
Spiced Cream Cheese Icing
125 grams cream cheese, softened
2 tablespoons butter, softened
2 teaspoons fancy molasses
½ teaspoon vanilla
½ teaspoon cinnamon
½ teaspoon ground ginger
pinch ground cloves
1 ½ – 2 cups icing sugar
Garnish
1/3 cup chopped crystalized ginger
Method:
Cookies: In a large bowl, beat the butter and sugar until fluffy. Beat in the egg and molasses until smooth. In a separate bowl, whisk together the flour, spices, baking soda and salt. Stir into the butter mixture until just combined.
Roll 1 tablespoon of the dough into balls. Arrange 2 inches apart on parchment-lined baking sheets. Press index finger into centre of balls to create wells about ½ inch deep by ¾ inch wide. Reshape the balls if they become distorted. Refrigerate for 30 minutes or until firm.
Preheat oven to 350°. Bake 1 sheet at a time until no longer shiny, about 12 – 15 minutes. Remove from the oven. Using the back of a 1 teaspoon measuring spoon, press gently into the wells to reshape. Let the cookies cool on the baking sheets for 5 minutes and then transfer to racks to cool completely.
Icing: In a medium bowl, beat the cream cheese with the butter until fluffy. Beat in the molasses, vanilla and spices. Beat in the icing sugar until smooth. Adjust the amount of the icing sugar until you have a nice firm texture that will pipe nicely and keep the shape of your piping tip. Using a piping tip fitted with a star-shaped tip, pipe icing into the wells of the cooled cookies.
Garnish with the chopped ginger. Refrigerate until icing is nicely set. You can refrigerate these cookies in air-tight containers for up to 3 days, or freeze until ready to serve.
Makes approximately 40 cookies.

Be sure to make these a part of your cookie exchange this year!

20 Responses to “Gingerbread Cream Cheese Thumbprint Cookies”
I love gingerbread “anything” and thumbprint cookies. You’ve kicked these cookies up a notch with your cream cheese icing and crystallized ginger 🙂
Thanks so much, Judi! I love thumbprint cookies too because you can do so many versions of it!! The options are just endless! Have a great week! 🙂
Beautiful post
Thanks so much! I really appreciate that! 😀
Thanks for sharing your recipe. Those a gorgeous cookies.
Really glad that you like them! 🙂
These look incredible! They are a fun twist on a Christmas classic!
Thanks Kat! I was so happy with the outcome, and they were gobbled up very quickly!
These look amazing and taste even better!! Reallyy good recipe
Thanks so much! Really glad that you like them!
Wonderful, Julianna. I think maybe there’s room to squeeze these into my 2018 Christmas Cookies List. I gotta make room! They sound too good to be left behind!
Hey Angie! I hope you get a chance to make them, because they are really worth it! Merry Christmas to you and your family!
[…] Gingerbread Cream Cheese Thumbprint Cookies from Julianna @ Foodie On Board […]
These look deliscious. We are trying the recipe today. Ill let you know how we make out. Thanks for the new holiday cookie idea!
Awesome! I hope you liked them!
[…] via Gingerbread Cream Cheese Thumbprint Cookies — Foodie On Board […]
While Christmas season is now behind us, this post not only gave me the cravings for this cookie but am also in my local super market picking up all the ingredients! Thanks for this great post
Well, I sure hope that you like them! They were a big hit here. Happy New Year to you!
I love all things ginger and these look really delicious! Beautifully photographed as well. I’ve never heard of fancy molasses… What’s the difference between cooking molasses and fancy molasses? Thanks!
Elegant!!! 💕